This post is not sponsored, all opinions and instructions are my own. Please DIY at your own risk. This post contains affiliate links. As an Amazon Associate & RewardStyle Influencer I earn a small percentage from qualifying purchases at no cost to you. Thank you for your support!
My instagram feed is often filled with lots of fabulous birthday pictures. I love to follow party planners and fellow DIYer’s who kick birthday decor up a notch! While the balloon arch trend is still going strong, the latest trend to sweep the party scene are large wooden taper candle holders.
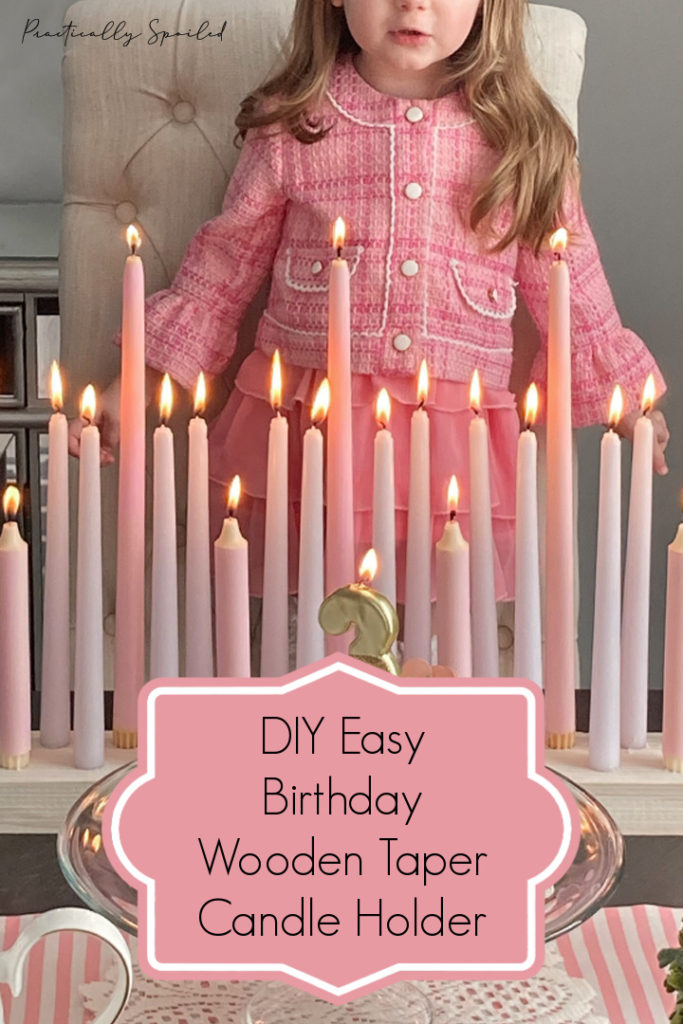
For my daughter’s ‘Tea for 3’ themed party I looked into purchasing one, but was kind of taken back by the prices. The bases alone range between $40 – $100, not including candles. I knew this wouldn’t be a hard DIY and that I could probably get it done for a lot less, so I made a plan. For about $15 TOTAL I made this large wooden taper candle holder. See below for a tutorial!
Level of DIY required: Beginner who’s used a drill once or twice before and can measure. Seriously, this isn’t complicated!
What you’ll need:
• A power drill – Love my Ryobi, updated version here
• Protective eye gear (Don’t skip this, the wood does fly around a bit!)
• A 7/8″, 1″ or 1 1/8″ spade wood drill bit – more on this in a moment
• A sanding block
• A measuring tape and pencil
• A precut 2 foot long piece of 2×4 – I got mine here (You could also use a 4×4 and/or do any length you would like with some adjustments. I used the precut 2x2x4 for ease. Make sure when you purchase the wood that you’re buying a straight, flat and dry piece. Sometimes these lumber pieces can be wonky and wet from how they ship/store them.
• Paint/stain/oil for finishing the wood. Depending on the look you’re going for. I used some Annie Sloan Chalk Paint in Old White that I had on hand.
• Taper candles of your choice. I had a few on hand and then filled in the rest with these from Dollar Tree. I go into this more and link additional affordable options below.
The first step is to figure out what size spade drill bit you need. Tapers are actually all slightly different in circumference. You want them to fit snugly in the holes without much room to move around. I found that with the Dollar Tree tapers a 7/8″ spade bit worked so that they were very snug, but a 1″ would have worked too. You may want to measure your tapers and choose the bit that’s right for you. You don’t want too big of a hole because you don’t want your candles to lean.
Next, measure twice, drill…well, a few times. For my 2x2x4 here are the the measurements and specs. (Below not to scale. Keep in mind your 2×4 will actually be 3.5″ wide rather than 4″)
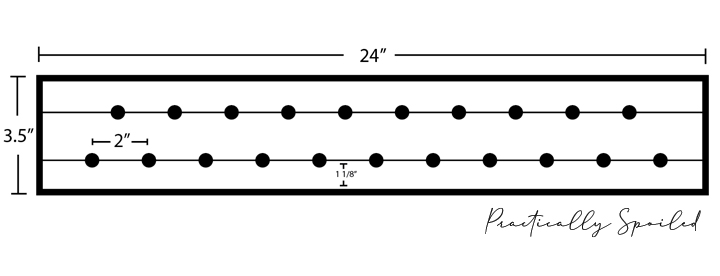
Once you have your marks, start drilling your holes. You want to go about 2/3 through the wood. Do not let your drill bit to come out the other side. Make sure that you’re going in straight down and using the fastest drill speed. Give your drill a break after a few holes. You’ll find the bit gets a little hot.
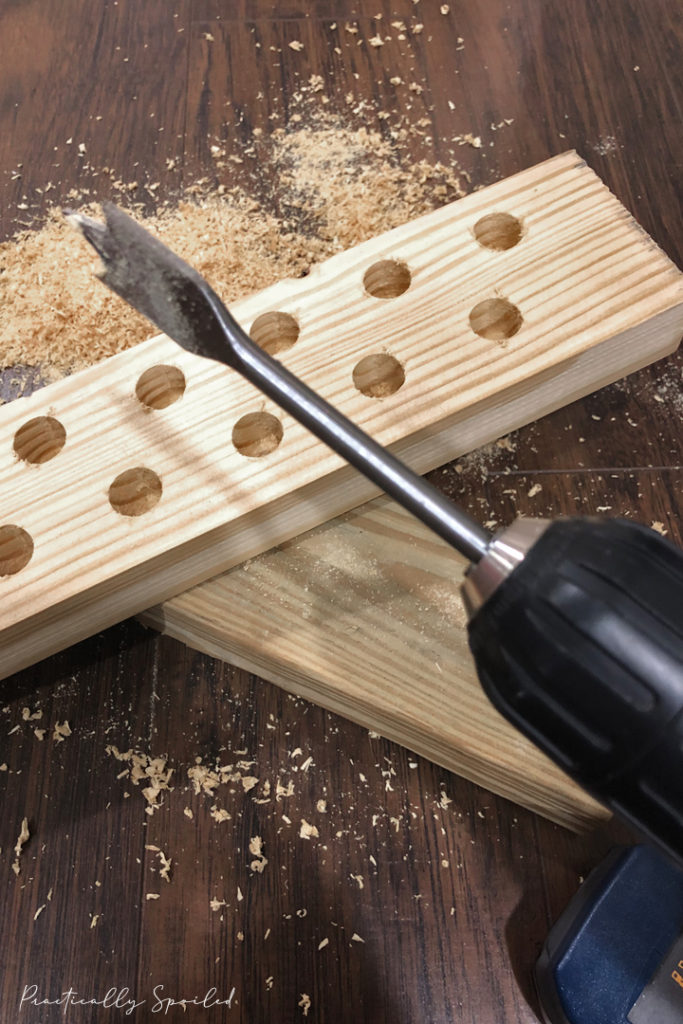
Don’t worry if your holes don’t align perfectly. Admittedly, I drilled slightly off in a few spots and it’s not noticeable once candles are placed. But do try to follow your markings as you don’t want the candles to be placed too close.
After all your holes are drilled make sure to get out all the wood shavings. Then give everything a few good passes with the sanding block just to smooth out any splinter hazards.
Wipe it down to remove any wood dust, then give it the finish of your choice. I watered down some Annie Sloan Chalk Paint I had on hand to create a white washed stain kind of look. Paint, spray paint, stain, or even a wood oil would all work. Be sure to allow proper drying times before using.
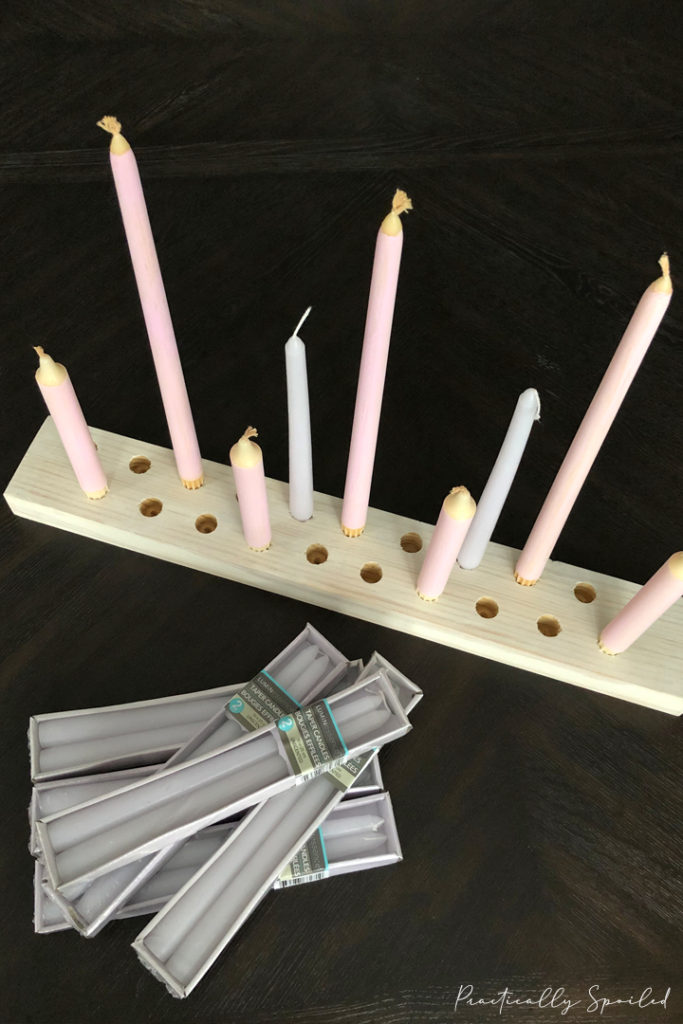
Once it’s dry, you’re ready to put the tapers in. These wooden candle holders look great when you vary the height and color of the candles. I happened to have some old tapers in various sizes on hand that were yellowed. I wanted light pink candles, but didn’t want to spend more money when I had these sitting around unused so I simply painted the shafts of the candle sticks with acrylic craft paint. I wasn’t going to be keeping these lit for more than just a few photos so I knew this would work. The remaining holes were filled in by the white tapers I found at Dollar Tree. They’re a great value because you get a 2 pack for $1! They also carry shorter emergency candles which are similar in size to the shorter ones pictured in my candle holder. If you can’t find them you can carefully cut down the full sized tapers using a steak knife in order to vary the heights of the candles. I chose to use 3 extra tall tapers in the mix because it was my daughter’s 3rd birthday. I happened to have them on hand. I found some additional inexpensive pink tapers here, blue ones here, and mut short ones here. These would be great mixed in with the Dollar Tree tapers.
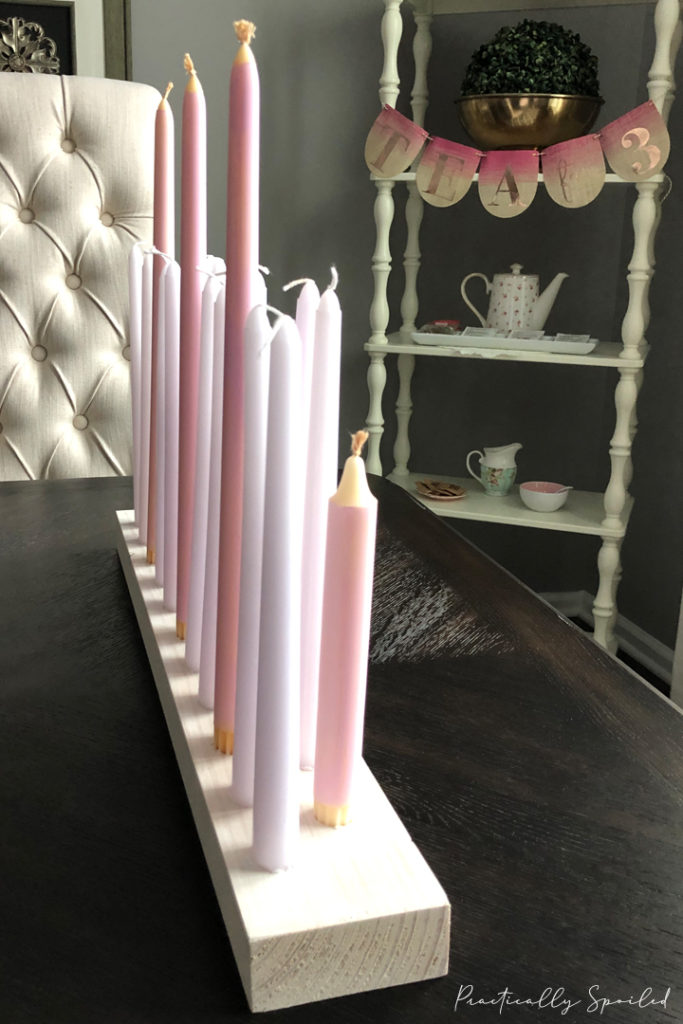
Once all your taper candles are in place, give them the wiggle test. They should not move at all. If they do they either need to be pushed in further or reenforced by using a lighter to slightly melt the bottom wax so it adheres to the hole. If you find your holes are too small, take a sharp knife and carefully shave down the first inch of the bottom of the tapers so they fit better. Trim the wicks down so they’re short and then it’s ready for display or use! (Pictures above were before my wicks were trimmed.)
WARNING PLEASE READ: BE CAREFUL! Guys, this is fire. A LOT of fire. While these look great for a picture, DO NOT leave this unattended when lit! When taking pictures while lit watch children, hands, clothing, hair, tablecloths, etc! It burns HOT and quick, so be prepared to take pictures swiftly. Finally, while it’s fun to blow candles out, these are really more of the “snuffing out” kind of candles. We blew them out and there was some char and quite a bit of smoke that I was a bit surprised by. Knowing that now, we should have made a wish, then used a candle snuffer to snuff them out. Save blowing out the candles for the birthday cake!
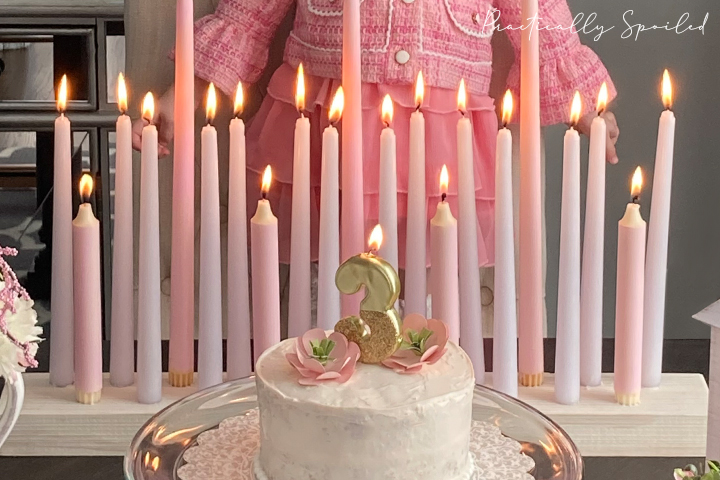
I love the way it came out! The look of awe when she saw so many candles was just precious! This also looks really pretty unlit as decor. You can see it on the console unlit in my post about the ‘Tea for 3’ party. With a little modification you could easily use this as a table centerpiece. To use as a centerpiece, I would spread the holes out a bit more so there are less candles overall and use shorter tapers. They also sell LED taper candles (Dollar Tree LED tapers here) which are an awesome SAFE way to keep this lit without it being a fire hazard.

Hello I made a candle holder but my base is not smooth how can I drill the holes smooth?
Not sure exactly what you mean by the base not being smooth, but using a drill bit like the one I used will make for smooth holes in wood.
can you share where you purchase your tapers? The holder was an inexpensive project, but i’m finding tapers in a variety of colors and sizes to be fairly costly. Thank you!
I reference it above – Dollar Tree!